Thursday, July 28, 2011

Victorian Covered Box

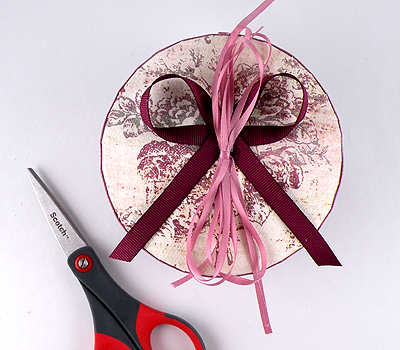
Here is another design I created using the soft color palette. I just love the muted tones. This beautifully decorated paper Mache box would make a great addition to any gift. This box not only serves as stylish gift wrap but also doubles as elegant reusable container. This design would work with any shape box. I created this design for Scotch Brand.

Difficulty – Medium

Materials
  • Paper Mache Box
  • Floral patterned scrapbooking paper
  • Sage scrapbooking paper
  • 1 sage fabric flower
  • 5/8 inch-wide pink grosgrain ribbon
  • 3/8 inch-wide wine grosgrain ribbon
  • 1/8 inch-wide pink satin ribbon
  • Metal flower accent with pearl (jewelry finding or button)
  • Scotch® Precision Scissors (for cutting scrapbooking paper and ribbon)
  • Scotch® Craft Glue Stick (for attaching scrapbooking paper)
  • Scotch® Quick-Dry Adhesive (for gluing ribbon and accents)
Instructions
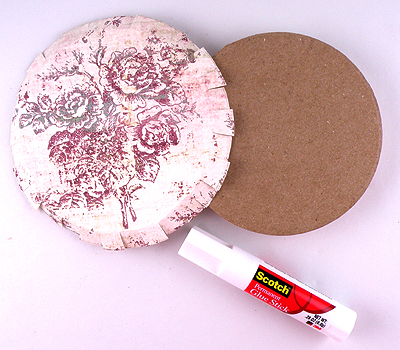
  1. Cut a piece of the floral scrapbooking paper with Scotch® Precision Scissors the size of the top of the box plus 1/3 inch for overlap. Cut slits in the overlap edge – this will help the paper form to the side of the box lid. Attach the paper to the top and sides of the box lid with Scotch® Craft Glue Stick.
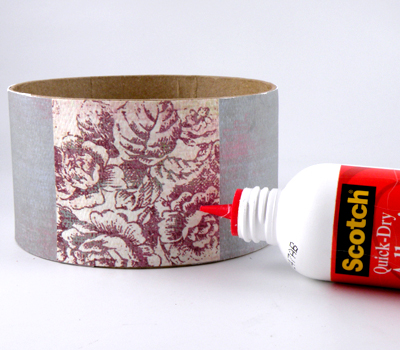
  2. Cut a piece of the sage paper the height of the box and the length to wrap around the box. Cut a piece of the floral paper the height of the box and about 3 inches wide to create an accent for the front of the box. Attach with Scotch® Quick-Dry Adhesive.
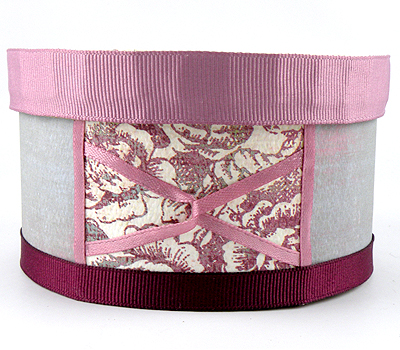
  3. Glue a piece of the pink and wine colored ribbon around the side of the lid and bottom edge of the box. Attach two pieces of 1/8 wide ribbon to the front of the box and interlock and form an X. Finish the edges of the front accent paper with ribbon on each side of the X.

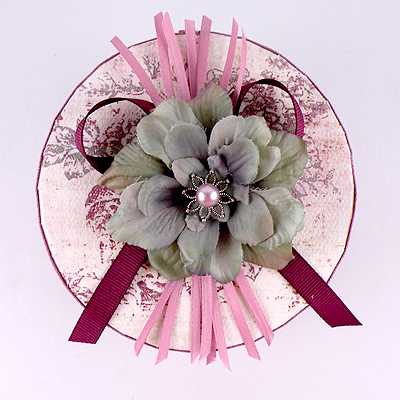
  4. Make a bow with the wine colored ribbon and attach to the top of the box. Wrap 6 loops of the 1/8 wide ribbon together, tie in the center and glue to the top of the box lid. Cut the loops of the 1/8 inch wide ribbon loops to form a fringe.

  5. Glue the flower to the center top of the lid and attach the metal accent and peal to the center of the flower with Scotch® Quick-Dry Adhesive. Let dry.




Tuesday, July 12, 2011

Muted Tones and Double-Sided Scrapbooking Paper

I love working with muted tones and subdued colors — they make such elegant designs. I found some double-sided scrapbooking paper in a cardstock weight with a beautiful pattern on one side and a coordinating solid on the other both in soft shades. It is so much easier to create a project when you already have the perfect color combination all on one piece of paper. I always save money when I find a double-sided paper I like because I don’t have to buy additional paper to match the colors. There were a few different designs of scrapbooking paper in the same palette so I purchased them all. The colors just spoke to me as if they were saying “please take home and make something beautiful with me”.

I also bought a stem of soft colored wedding flowers and several vibrant colors of ribbon that I wanted to mix into the design. All of the materials were purchased at a local Michaels craft store.

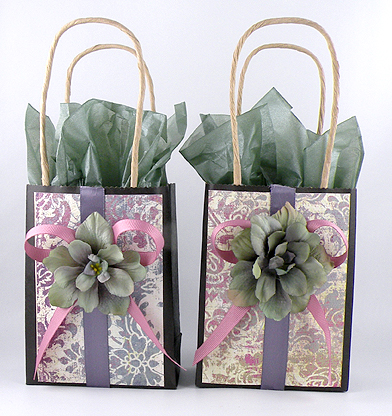
Here are the mini gift bags I created with these items for my daughter's end-of-the-year teacher gifts. They were so easy to create and looked beautiful! I was very happy with my color choices. I only used one side of the scrapbooking paper for this design. I will post more projects using these materials soon.

Friday, July 8, 2011

Wrapping the Wrap

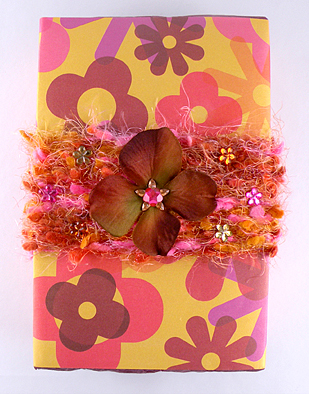
Here is a quick way to wrap a pretty gift with things you have on hand. A band of yarn wrapped around the box is a fast way to add interest with texture and dimension. This gift took less than 10 minutes to create and didn’t cost a thing. Look around your house, you will find all sorts of treasures you can used to adorn a gift.

Click here for instructions

Friday, April 15, 2011

Reused Fruit Baskets

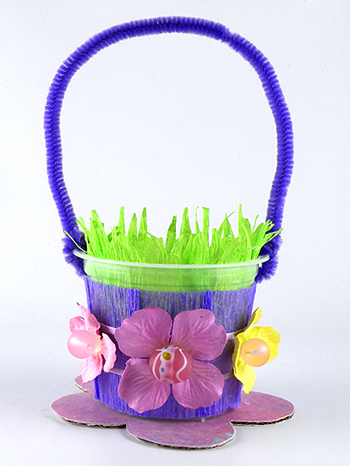
Snack cups can be transformed into mini Easter baskets. These cute little containers would dress up Easter table or make great party favors.

To make the handle, poke two holes in the cup and feed wired chenille through the holes. Cut a flower shape out of decorative cardstock and glue it to the bottom of the cup to form the base. Wrap the cup with purple craft paper and create decorative grass with green craft paper (I used leftover party streamers). Decorate the front of the cup with flowers and beads or any decorative items you have on hand.

Decorative Pail

Accent your home with this stylish flower pail created from repurposed and recycle items found around the house. This design has dimension and elegance that could not be achieved from using new items. This decorated pail can be used hold flowers, hold small items, and it can even double as a gift or Easter basket. I entered this project in the Green is Universal reuse contest.

Click here to see the instructions on how to make this project.

Wednesday, March 30, 2011

Bearing Gifts

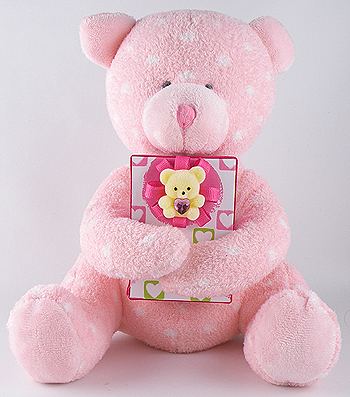
This adorable bear is the perfect way to present a gift. I used a bear with long arms and I added Velcro to the paws so they would lock together to hold on to the gift. I made the gift box reusable by decorating the lid with a pretty bow and a tiny bear to make it even more lovable.

Sunday, March 27, 2011

Reused Items Gift Wrap

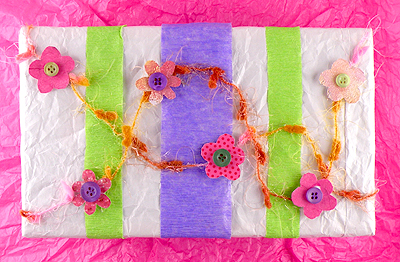
This is my newest project I created for Scotch Brand for their website. A fun spring gift wrap design can be made with items found around the house. I cut the flowers from pieces of reused greeting cards — they have such beautiful designs it seems a shame to not reuse them. I also used spare buttons, a strand of yarn and leftover party streamers to decorate this gift.

Click here for instructions to create this design

Sunday, March 20, 2011

Party Hat Gift Wrap

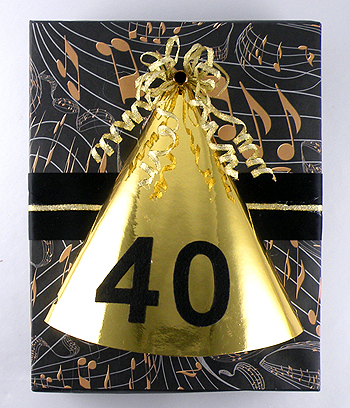
I always try and use something recycled when wrapping a gift. When a repurposed piece is added to a gift, it gives the present special character that you can’t get from using all new items.

This is a gift I wrapped for a friend’s 40th birthday. I like to incorporate part of the recipient’s interests into my gift wrap to give it that personal touch. The birthday guy loves music so I used a fun musical note scrapbooking paper to set the tone of the wrap. I reused a birthday hat and pieces of ribbon leftover from the holidays to accent the gift. It has a 3D effect that may not be apparent in the picture.

Click here to learn how I made this design

Saturday, March 19, 2011

Spring Flower

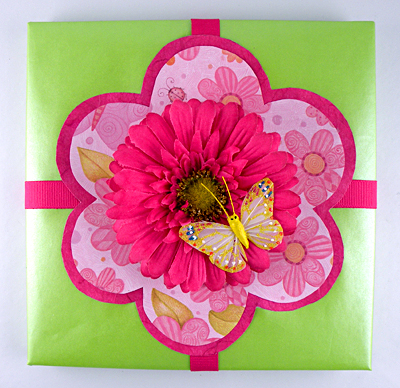
Here is my latest gift wrap design I created for 3M Scotch Brand. Spring almost here and I wanted share this charming flower gift wrap that was inspired by the much anticipated season. To create this look, I layered paper flowers cut from scrapbooking paper, a fabric daisy and a butterfly to add dimension to this design. I love combining different types of materials to my designs for texture and to create the unexpected.

Click here to see step-by-step instructions for this design

Thursday, January 13, 2011

Recycled Magazine Gift Wrap

Before you toss your magazines into the recycled bin, cut out thoughtful words to create a custom message attached to your gift wrap. Hand torn strips of paper create an artistic touch to the gift. Strips of paper are cut to make a paper ribbon strip and bow. I glued extra buttons onto the center of the bow for an extra touch. This gift is wrapped with a white shopping bag leftover from the holidays but the white back side of reused wrapping paper can also be used.

Not only will this gift wrap WOW your recipient – it can be created with items you have on hand.

.