Thursday, December 27, 2012

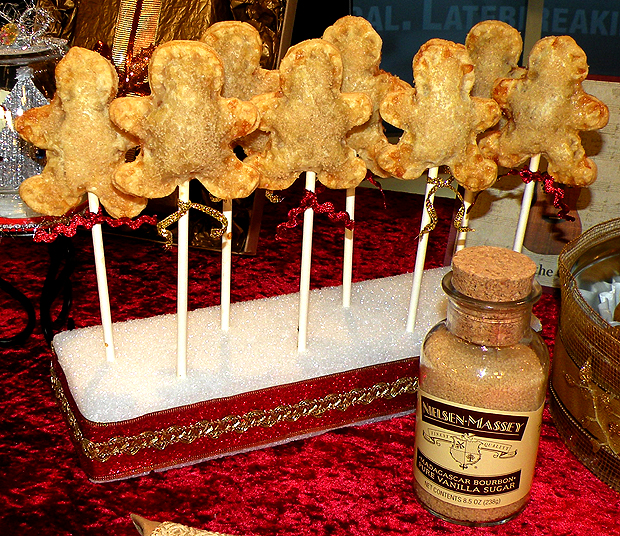
Apple Pie Pops


I thought it would be a fun for the holidays to make mini apple pies on a stick shaped like gingerbread people. I knew I would have to precook the filling for these little pies first or the apples would never get soft. I researched Classic and Dutch apple pie recipes to get an idea of how I wanted to make my filling. I used store bought pie crust to save time because with so much to do for the holidays.

Materials
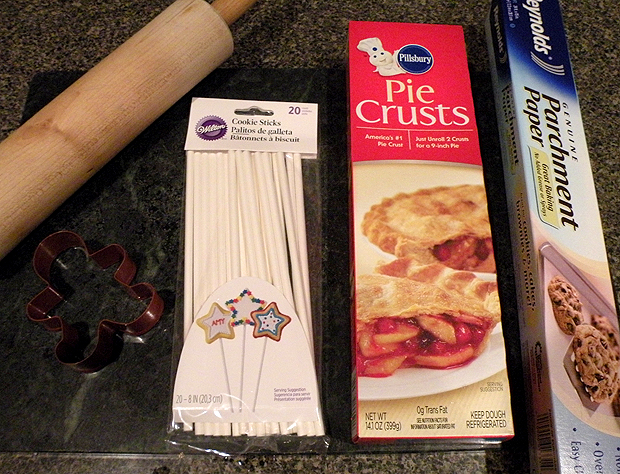

  • Rolling Pin
  • Pastry Board or cutting board
  • Cookie Sticks
  • Pie Crusts
  • Parchment Paper
  • Cookie Cutter
  • Baking Sheet
Filling Ingredients
  • 3 Large Granny Smith Apples
  • 4 Large McIntosh Apples
  • 1 tablespoon fresh Lemon Juice
  • ½ t lemon zest
  • ¾ cup sugar
  • 2 t cinnamon
  • ¼ t nutmeg
  • ¼ t salt
  • 1 T dark brown sugar
  • 1 T butter
Crust Ingredients
  • Pre-made Pie Crust
  • Egg White
  • Nielsen-Massey Vanilla Sugar or Raw Sugar
  • Cooke Pop Sticks
  • Ginger Bread Person Cookie Cutter
  • Parchment Paper
Mini Pie Holder
  • Rectangular Styrofoam Block
  • Decorative Ribbon
Apple Filling Instructions


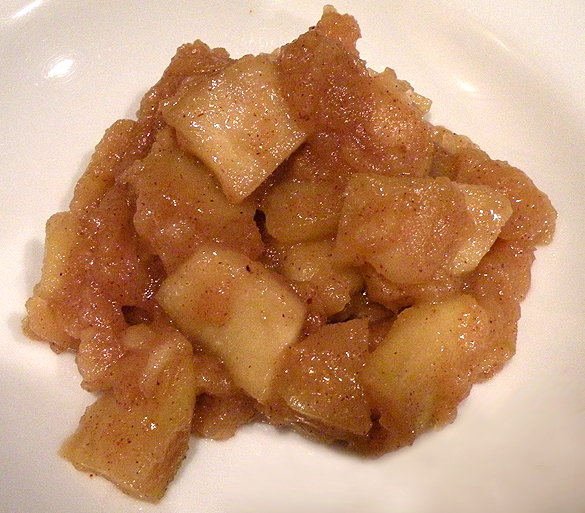
Peel and core the apples. Cut them into ¼ inch slices, chop them into smaller pieces and place them in a large bowl. Toss the chopped apples with lemon juice and zest. Since it was my first time making this filling for pie pops, I cooked the apples in slices. They were too big and I had to chop them up smaller after they were cooked so they would fit into my gingerbread shapes.

Mix the sugars, cinnamon, nutmeg and salt in a medium bowl.  Toss the dry mixture into the apples. Start with ½ cup of sugar. I you want a sweeter filling, the additional 1/4 cup of sugar can be added if needed.

Heat 1T butter over a medium heat in a Dutch oven or medium sauce pan and add the apple mixture. Coat the apples with the melted butter and cover to cook. Stir occasionally until the apples get soft, about 10 minutes. The McIntosh Apples with start to break down. Taste the filling while it is still cooking to see if you need to adjust the sugar and spices to your taste.

Once the apples are soft, remove the lid and continue to simmer until thickened. You don’t want to have runny liquid in the filling or you will have soggy pie pops and they will fall off the stick.

Remove the filling from the pan and let cool.

Ginger Bread Shaped Pie Instructions

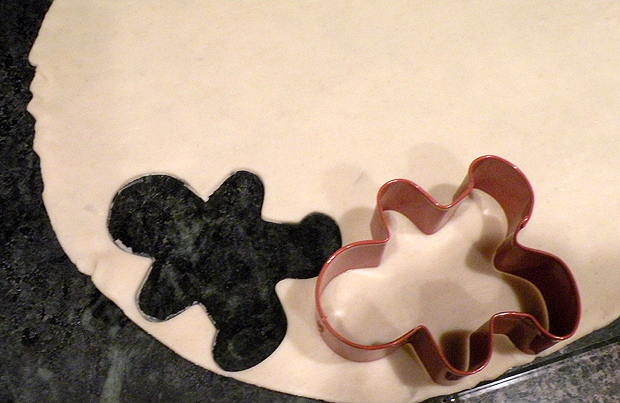
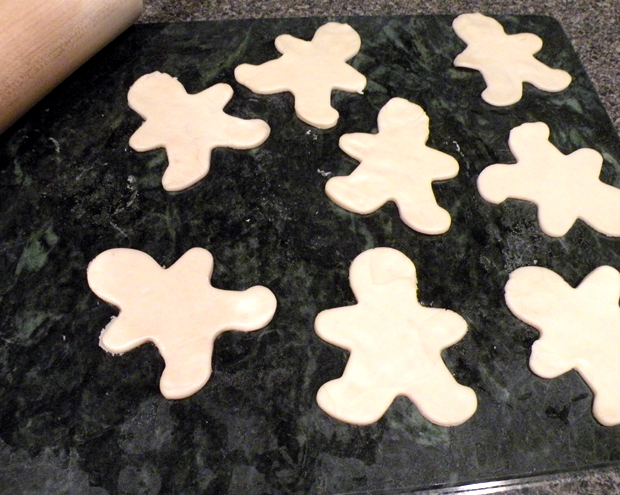
Unroll your pie crust onto a pastry board and start punching out ginger bread shapes. Roll out the extra pieces of crust to make more shapes.


Place the cut people shapes on a parchment covered cookie sheet.


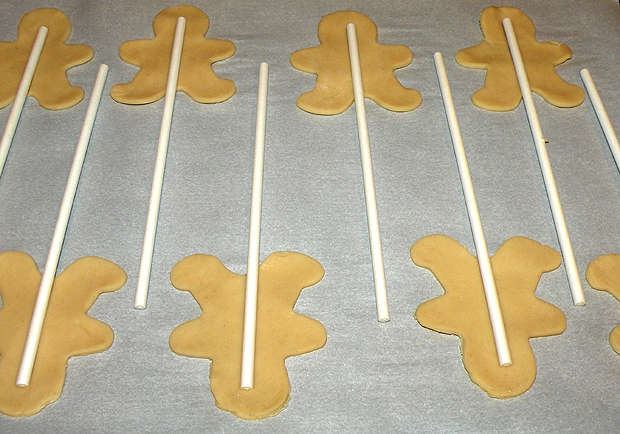
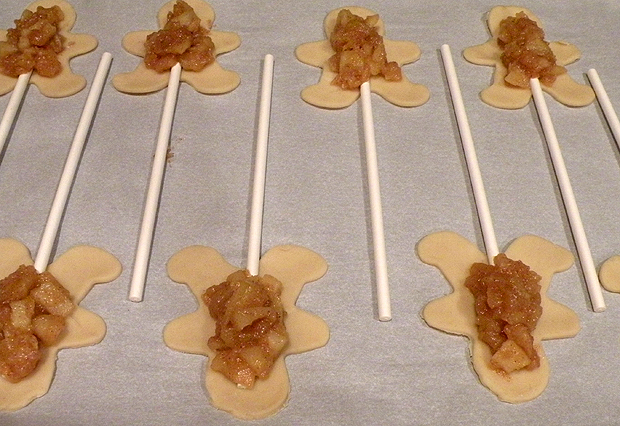
Press a cookie pop stick into to cutout shapes. I put them to halfway up the head so the cooked pies would be secure.

Add filling. I have a tendency to add too much and it starts to squeeze out when I am sealing the pies.


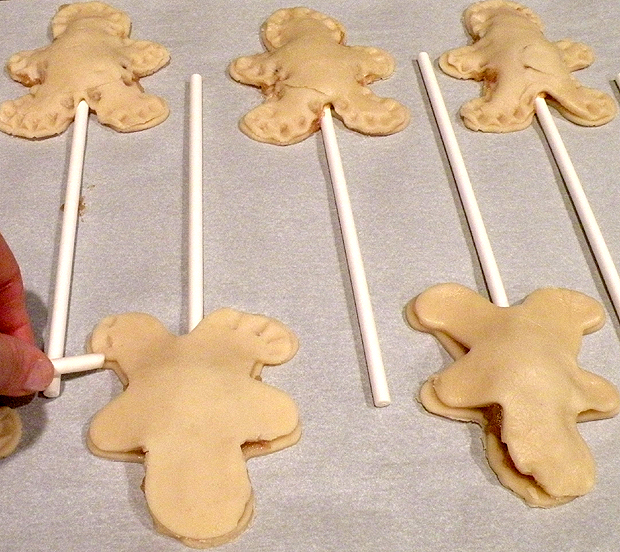
Add the top piece and use a cookie stick to press and seal the edges together. You can break a small piece off of the cookie stick to make it easier to maneuver around the other pies.


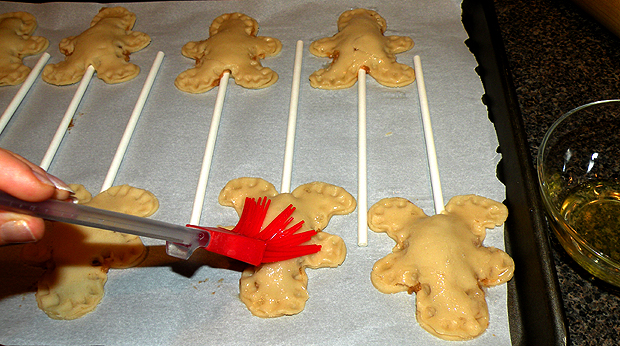
Brush top of the pie people with egg whites…this will give the baked pies a beautiful golden brown appearance.


Sprinkle the pies with vanilla sugar for that extra special touch.


Preheat the oven to 375 degrees and bake for about 12 – 15 minutes. Start checking at 12 minutes to see how they look. Keep baking until they are golden brown.
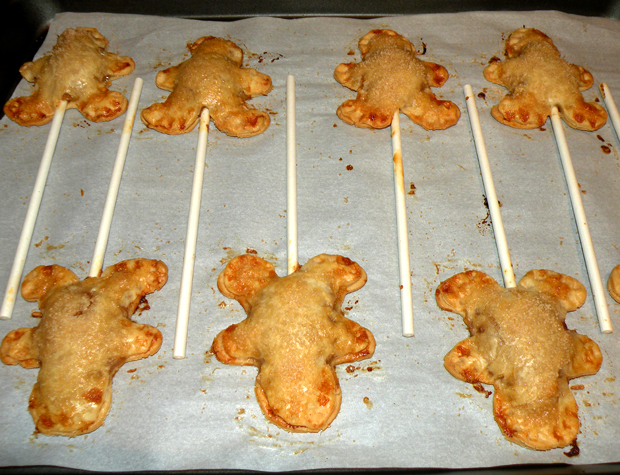


Push the sticks of the baked pies into Styrofoam to cool. Decorate the Styrofoam with ribbon and tie bows around each of the pie pops for a pretty presentation.
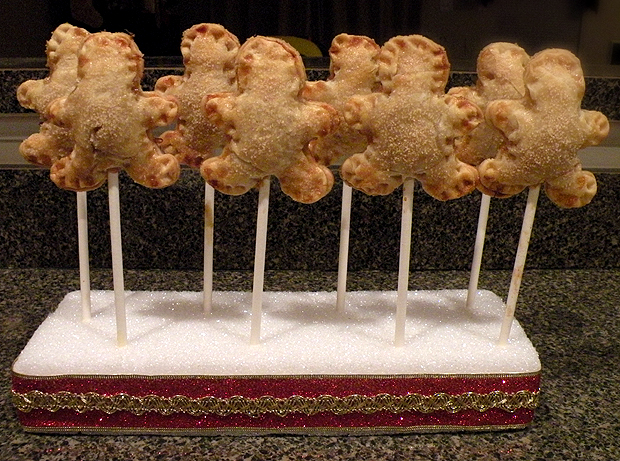


Be creative and use different cookie cutters to come up with your own pie pop shapes. You can also use different types of fillings to create all types of fun pies on a stick.

Saturday, December 22, 2012

Holiday Gift Looks

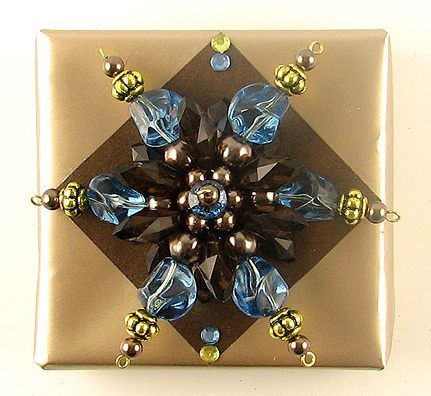
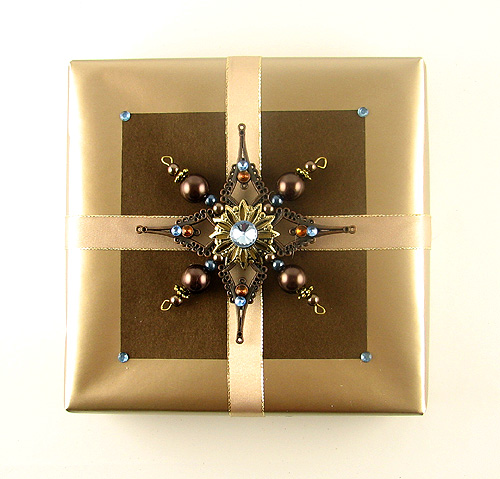
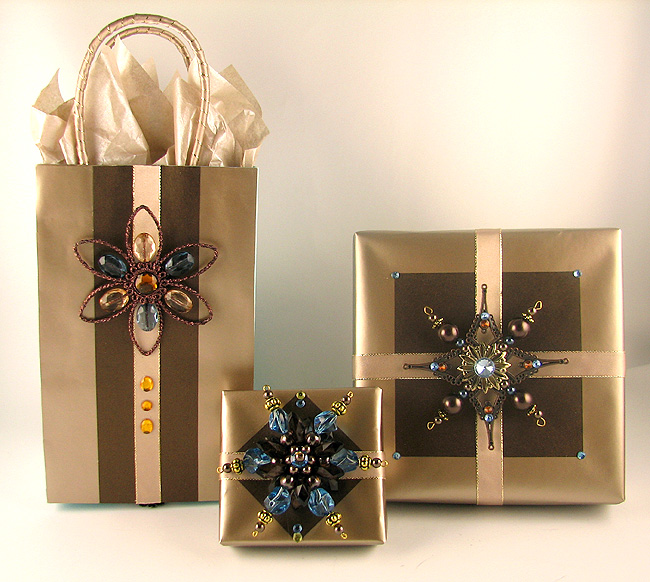
I have compiled photos of some of the gifts I have wrapped to give some ideas of how to wrap gifts in a beautiful way that are unique for each individual. I always like to change the style of my gift decorations to suit the personality of the recipient. I think that the presentation of the gift is just as important as the present itself. I love to see someone’s face light up when they are given a gift that has been wrapped with care. It makes them feel special and brings extra happiness to their day.

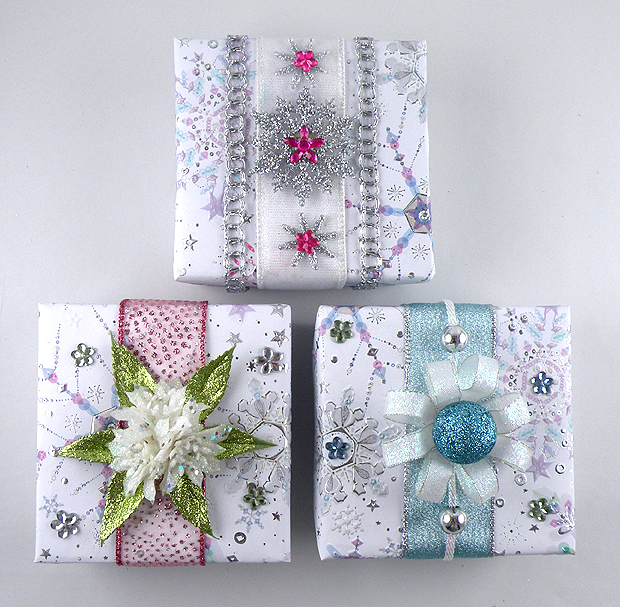
Icy Gifts

I used ornaments, beads, holiday picks, ribbons and rhinestones to make these icy gifts. This winter theme is perfect for a nonspecific holiday.


Papillon

I love tone-on-tone gifts. I found inexpensive butterflies at the craft store and exaggerated the wings with a big fluffy bow that I made from wired ribbon.


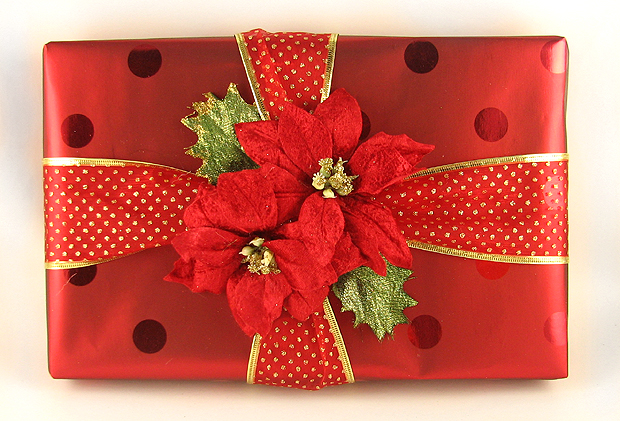
Poinsettia Power

Holiday flowers are an easy way to add elegance to a gift without making a bow. Just pull them off the stem and glue them directly on to the center of the gift. I like to cut off a few leaves and tuck them under the flowers to add a little more color.

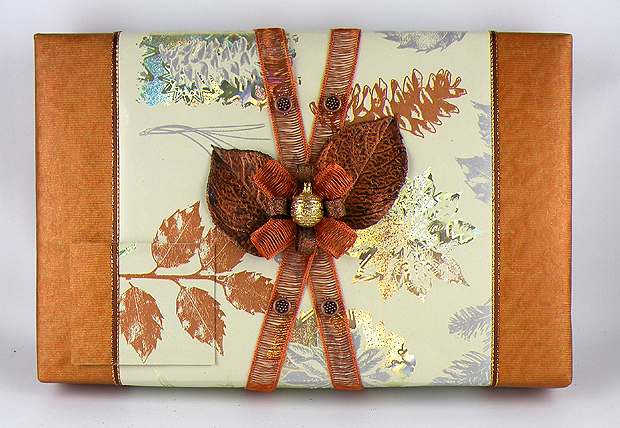
Brawnz

Leaves

This is more of a masculine gift with the bronze leaves and beads for the brawny man who doesn't like flowery gifts and bows. I layered two types of paper to get this look and then lined the raw edges with thin ribbon. If you notice, I matched the wrapping paper on the left bottom side to make a gift card that blends into the gift.

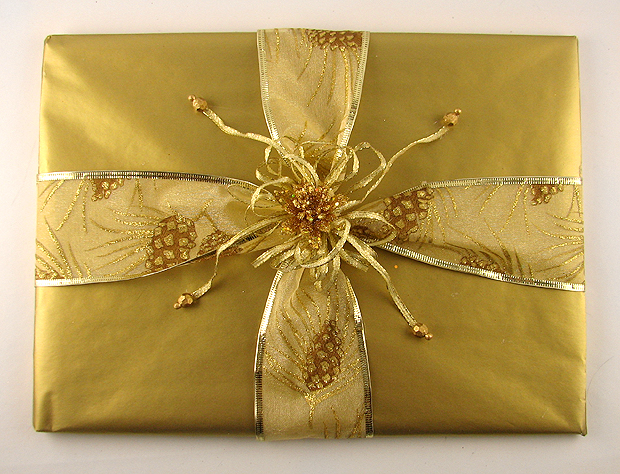
Five Minute Gift Wrap This was just a quick five minute gift I wrapped because I had to run out the door with a present on short notice. I doubled tissue paper for the wrapping and found some ribbon pieces, beads and flowers to make look classy. You can never go wrong with a tone-on-tone gift design...it makes even the simplest gift look elegant.

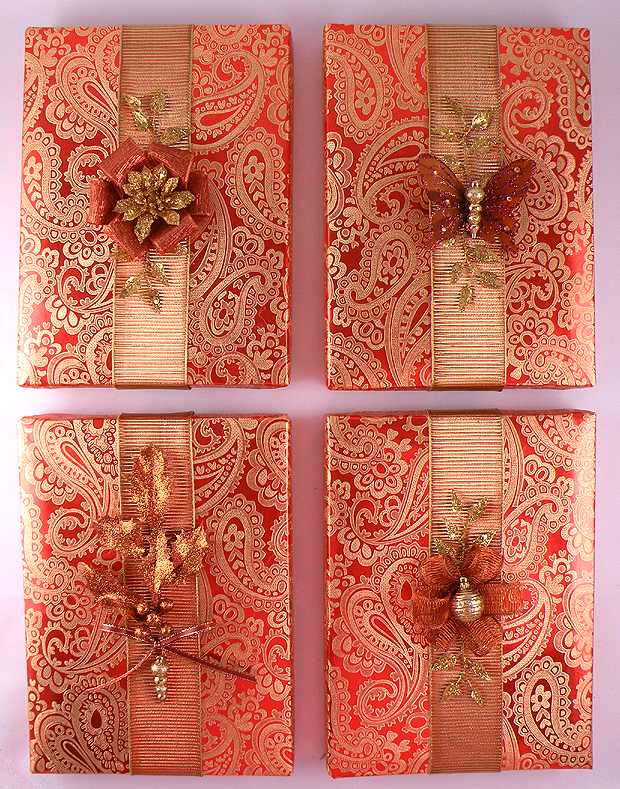
Deja Vu

Tone-on-tone again but each of the accents is slightly different. I like to cut pieces off of holiday picks to attach to the gift to add warmth and elegance. These were also very quick and easy to make.  I just wrapped a band of ribbon around the gift and glued on accents. People look at these designs and at first they think they look almost same but yet somehow different....


I hope this gives you some ideas and inspiration. Just remember, there are no rules to gift wrapping. Just be creative and your gift will come out beautiful and unique.

Happy Wrapping!  

Saturday, December 15, 2012

How to Ship a Beautifully Wrapped Gift


As most of you already know, I love to make beautifully wrapped gifts that are unique and wow the recipient. I feel that the presentation is part of the gift and makes people feel special when care is put into the decorating of the wrap. Shipping a beautifully wrapped gift box, however, where the bow stays pretty and the paper doesn't get wrinkled is has always been a difficult task for me. I have always been worried that the gift will get mangled and decorations will pop off when they are stacked with other boxes and jostled about during the shipping process. I was able to put my mind at ease by developing a method for sending gifts through the mail that will ensure that they look as good upon arrival as they did when they started their journey. This is what I came up with and it works every time.

Materials:
  • Scotch® Mailing Box
  • Scotch® Packing Noodles
  • Scotch® Cushion Wrap
  • Scotch® Shipping Packaging Tape
  • Build a Scotch® Mailing Box slightly larger and deeper than the gift you wish to send and secure the bottom with Scotch® Shipping Packaging Tape. The mailing box should be several inches deeper than the gift so once the box is sealed the wrapped gift will have a few inches of air space from the top of the mailing box.

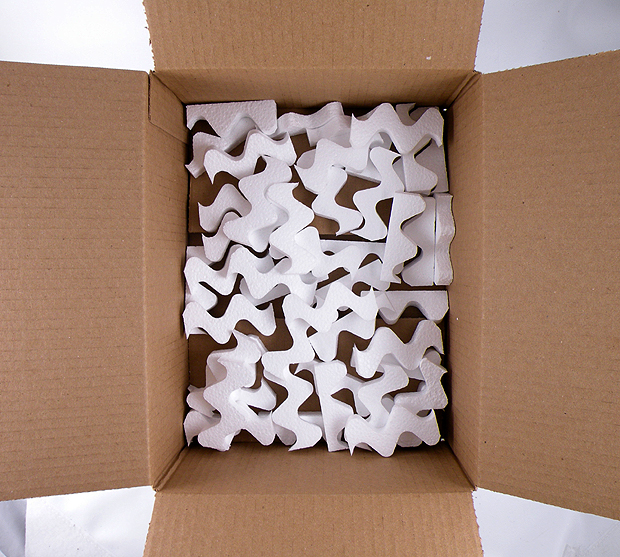
  • Cover the bottom of the box with a thin layer of Scotch® Packing Noodles.
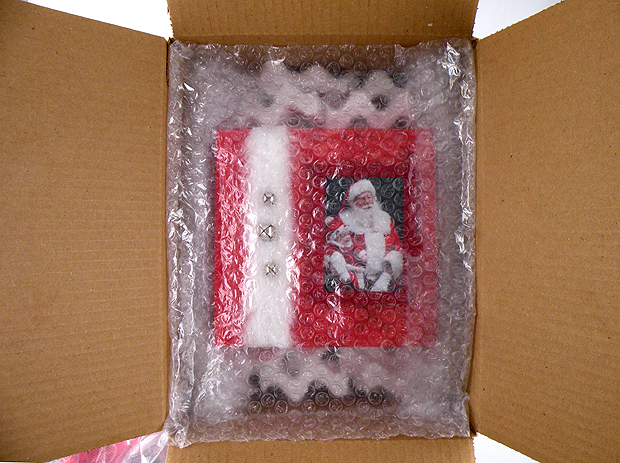
  • Place the wrapped gift centered inside the shipping box. Loosely roll two tubes of Scotch® Cushion Wrap and tightly fit them on each side of the gift. Make sure the gift is wedged in place and will not move if the gift is tilted or turned on its side.

  • Add more Scotch® Packing Noodles above and below the wrapped box where it not protected by the bubble wrap rolls.

  • Gently place a layer of Scotch® Cushion Wrap over the top of the gift to protect the pretty decorations.
  • Fold in the sides of the Scotch® Mailing Box and secure with Scotch® Shipping Packaging Tape. Your gift will arrive at its destination as beautiful as it was when it was first wrapped.
For multiple gifts, use a larger box and make sure all of the gifts are wedged in place with bubble wrap so they do not move and they will arrive intact.

Monday, December 10, 2012

Tissue Box Stockings


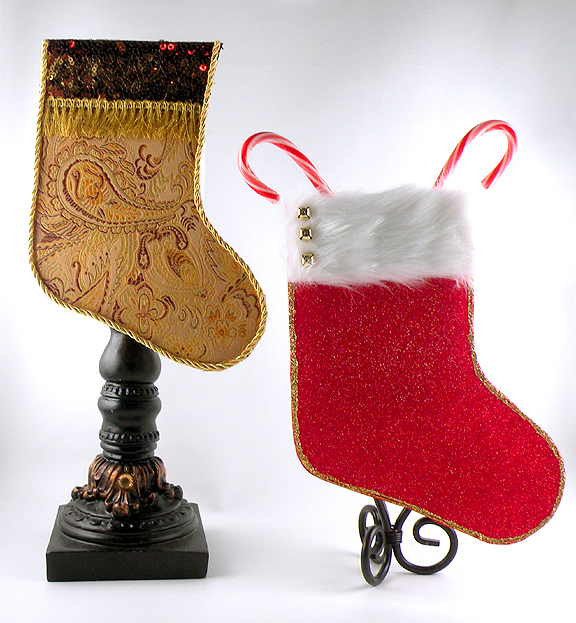
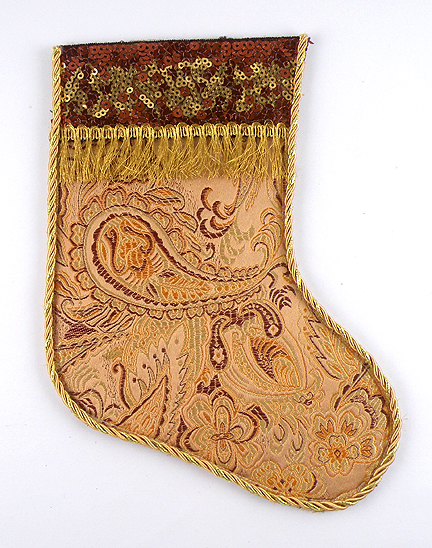
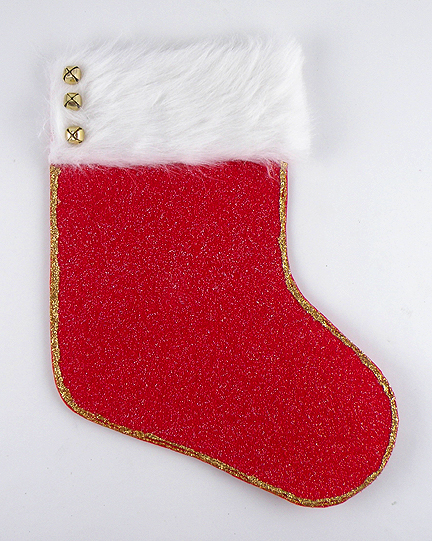
I love the look of Christmas stockings…they add a warm festive touch to holiday decorations. As much as I love them, I have never cared for the way they look when they are full. They get all lumpy and lose their stocking shape. I came up with a solution to the warped stocking look. Anyone who is familiar with my designs knows about my love for reusing household items. I decided to use my empty tissue boxes to make fun stockings that can sit on a shelf or mantel and will still look pristine when filled with candy and gifts. Here I am showing them sitting on some candle sticks.


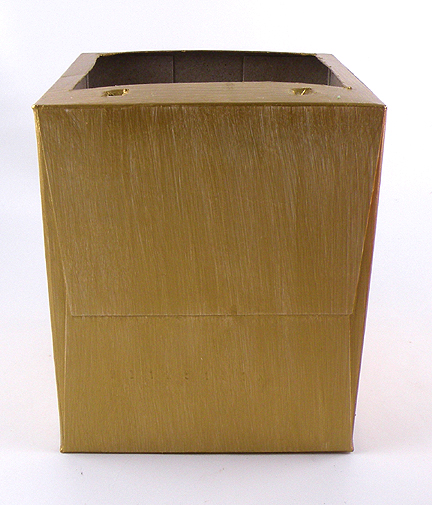
I cut top of the box in a rectangle shape and left a 1/2 inch border on the sides and 1-1/2 inch border in the front. I punched holes out in the wide part of the border so I can poke some candy canes through. I then painted the boxes with acrylic paint to match the color stocking I am going to attach.
I made a stocking shape that would fit nicely on my tissue boxes. The gold stocking is a brocade fabric that I stiffened with some sturdy iron on interfacing. I glued cord, a sequence strip and fringe to give the stocking fancy embellishments. The red one was very easy because I used glittery gold sparkly stiff felt and outlined the shape with glitter glue. I bought a furry border and bells and attached it the the stocking with glue.

Once the stockings are dry, just glue them to the front of the box on the side with the wider border and holes. Add some candy canes and put them on your mantle. This is a really easy and fun project that kids would love create. The nice thing about this design, is you really don't need much of anyone piece and can decorate however you want to make it special.

If you would like the pattern for stocking shape used here, just email me and I will send it to you. If you make this design, send me a picture, I would love to post it on my blog.

Wednesday, November 28, 2012


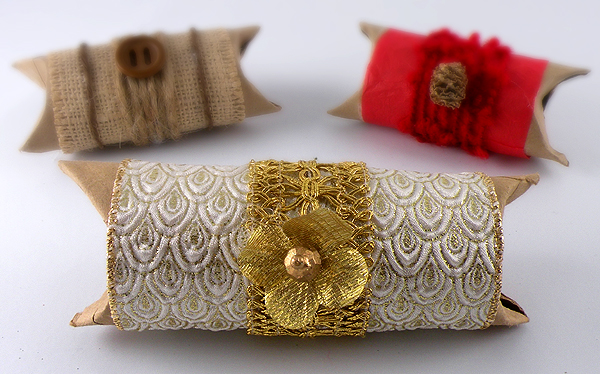
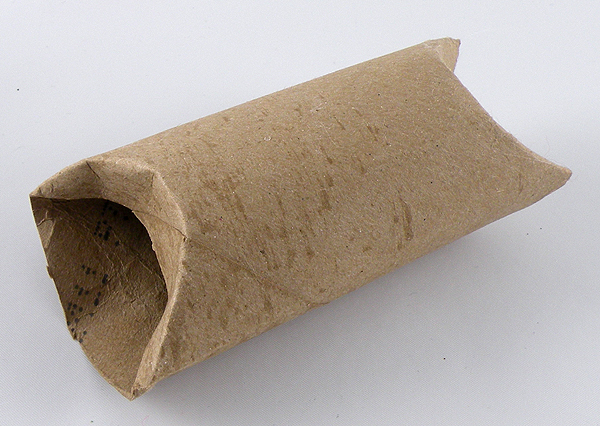
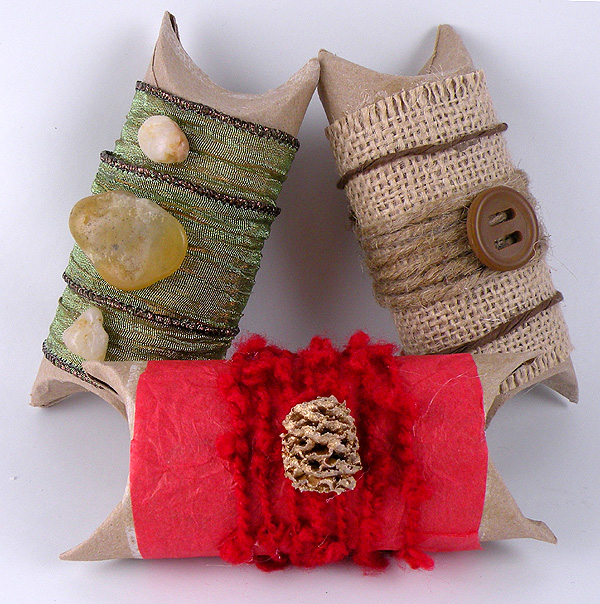
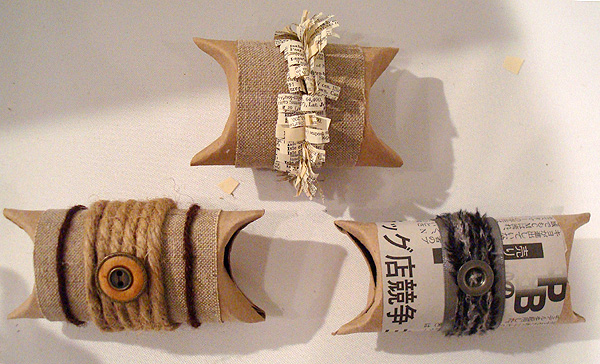
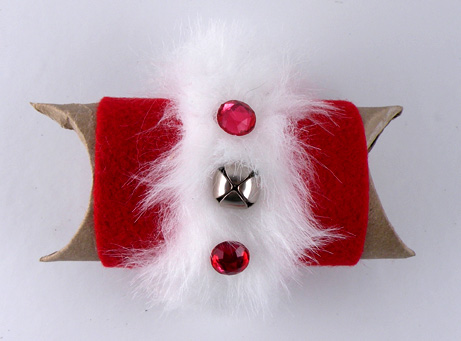
I love to find interesting and inexpensive ways to wrap gifts. There are so many items that can be found around the house to use to create unique gift wrap.  Reused paper towel, wrapping paper tubes and even toilet paper rolls can be used to make pillow boxes accented with items you have on-hand. Scraps of ribbon, buttons, newspaper and anything else you have laying around can create there fun little pillow boxes. Small gifts or candy can be placed in these adorable and easy to make treasures.


These can easily be created by cutting the size of the tube desired and press in the ends to create a pillow box. Use yarn, buttons, fabric and anything else of interest to wrap around the tube and glue. Just be creative and have fun. Insert the gift and use tape to seal each end to secure the gift inside. I have a lot of fun making these pillow boxes and it is a good time to start so they are ready for you when it is time to give a small gift.


Tuesday, November 27, 2012

Crown Jewels


Anyone who is familiar with my designs knows that I usually do not decorate gifts with bows. I used to think that in order for a gift to look like a gift, it had to have a big bow centered in the middle of the box. Although I have some designs on my website with large fluffy bows, I have changed my style to use things other than a bow to accent my gifts. It also takes so much ribbon to make a big bow which adds to the cost of wrapping a gift.  I just feel that there are so many more interesting and unique items that can be used to embellish a gift.


I bought these ornaments on sale from Michael’s
.

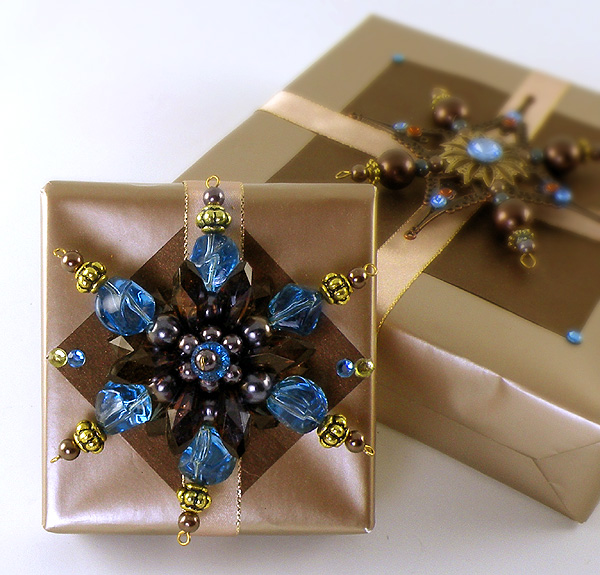
I love to decorate gifts with ornaments. I find inexpensive ornaments at the craft store to create an elegant and dramatic gift wrap. It also becomes part of the gift because it can be used as a real ornament after the present is opened. Also, if you are changing your tree decor,  you can use ornaments you already have to add to the gifts. The nice thing about using an ornament as the accent piece is you don’t have to do much else to decorate the gift. In this design, I just layered some pieces of decorative paper and you have a beautiful gift that will definitely impress the recipient.

How to make the Crown Jewels design


Saturday, November 24, 2012

Shopping Bag Wrap


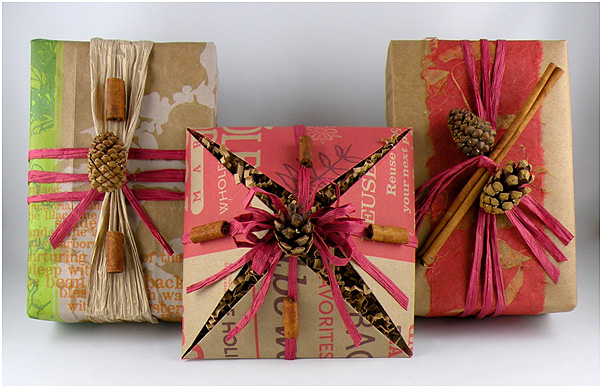
This trendy design is inexpensive to create and the cinnamon gives the gift a nice holiday scent.

Now that Thanksgiving is over it’s time to start thinking about the holidays. While you are still feasting on your turkey leftovers, it's a good time to start gathering items to wrap your holiday gifts. I remember the days when I would spend $80 to $100 on decorative wrapping paper to make my gifts look unique and beautiful. Everyone would always say “Gina always wraps the best gifts!” I have come to realize that the most interesting gifts do not have to be created with fancy, pricey wrap and embellishments. Some of my favorite designs are wrapped with reused items and natural elements like this shopping bag wrap.

The sooner you start getting your supplies together the less money you will spend on gift wrap. You can even start making some of your gift bags and pre-wrapped boxes in advance. Over the next few weeks, I will be posting design ideas and tips on how to save money wrapping gifts this holiday season.

How to make the Shopping Bag Wrap


Sunday, September 30, 2012

Create a Festive Luau Party on a Budget

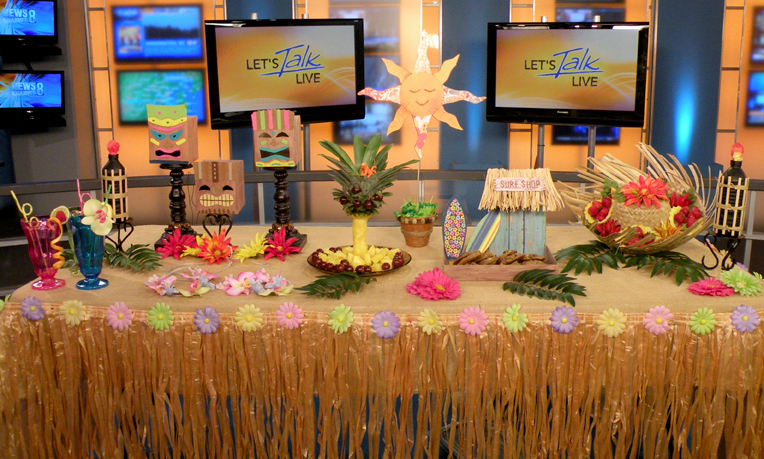
I like to end the summer with a festive, theme inspired barbecue. This year I decided to have a Labor Day Luau Party. Adding a Hawaiian theme creates instant fun to any event. I had a great time creating inexpensive luau decorations from household stuff and items found at a local craft store. Here is a a video of me showing my designs on Let’s Talk Live in Washington DC.

Friday, April 27, 2012

Earth Day Crafts and Green Project Ideas

I appeared on NBC News Channel 11 WBAL on Earth Day to show some of my green crafts using household items and re-purposed materials. I always love showing the host how to create fun and beautiful crafts out of items that are usually discarded and thought of as trash. I think she was a little surprised at my wrapping roll cuff bracelets and milk carton vases.